Kale is a leafy cool season crop (meaning you can plant it spring or fall. I planted some transplants back in November and the plants survived the winter well. They have been ready to harvest for a while, but i just got around to it. With Kale I made my favorite Olive Garden soup Zuppa Tuscana, or Italian Wedding soup. Recipe here.
Strawberries are the easiest fruit to plant in your home garden.
You can plant plugs (small transplants) in November from your regional fruit supplier- i recommend Ison's nursery, or you can buy larger transplants from your local garden center in march.
Baby strawberry
One strawberry plant only produces berries it's first year. Then they are unique in that they send out runners to make baby plants. Their babies will produce the next year and so the cycle of life continues on. For the gardener, this means that you only have to buy a plant once!
Because of this, it is up to the Gardener to dug up their old vines and 'train' the baby plants. Here is a video about training you strawberry runners the second year.
Spring is here, it was 72 degrees
yesterday and i got my first garden sun burn! It is time to begin preparing beds for this years garden
season. Since I already have made my raised beds and built good soil
with organic matter and top soil, all I need to do their years is maybe add a little more garden compost (bought or homemade:see
Composting). I still have half a bag of 10-10-10 in storage so these
are three steps to RE-preparing my plasticluture and drip irrigation
raised beds.
Clean Up: clean out your old
plans
Most of my plants were chopped down in
the fall of last year to prevent pest from finding them, now that
the root systems are rotting and the soil is moist, I just ripped up
the old plant root and stalks that remained. Because I use a basic
grid square foot gardening layout, I need to make room for the new
plants. Most of these plants and roots can be placed in the compost
pile (not weeds). (for perennial herbs trim and cut back beds and
for strawberries dig up mother plant and train runners)
Roll back plastic mulch
raised beds after rolling back plastic
One thing I love
about plasticulture is that I can simply roll it back when needed.
The straw I use on top can be removes easily (unlike pine bark) or
simply refreshed with new straw. Although straw does insulate my
bed when placed on top of plastic I simply use it because it make my
garden LOOK pretty and is very cheap!
Pull out and replace drip lines
if necessary- This is the one
time a year you have access to your whole dip lines, so replace them
if needed. You can replace them every year, but I only replaced the
ones I had accidentally cut a hole in!
Break up your soil and add
organic (natural- not 'organic') composted matter and fertilize.
With
my drip lines removed, I can spade my soil to my hearts content. My
soil texture still looks great (8-10 inches of non clumpy semi black
dirt!) so all I needed to do was add about 2-3 pounds of granular
10-10-10 fertilizer. Organic fertilizer is more expensive and this
is one area I don't understand the benefit of 'going organic'. I can
buy a enough fertilizer for my 800 square foot garden for $7.00. OR
I could shovel in 150 pounds of pounds of blood meal and horse manure. If you have it use it- but all i have around here is baby and dog poop! Synthetic fertilizer is simply
man putting natural minerals together in granular form. I'll take
it!
Re-bury drip line- Now
that my soil is ready for the new year. I can rebury my drip lines.
Cover back up with plastic
mulch- You can use all new
plastic much each year (it certainly is cheap enough) or you can
reuse last years. Some beds (like corn) I left alone because I had
very few holes in plastic, others I had to replace. The more holes
you have in you plastic the more moisture escape AND the more weeds
you will have.
Asparagus take patience, and in the
word of Inigo Montoya “i hate waiting”.
I planted asparagus because its a perennial ( comes back every year) that lives and produces for 16
years! The catch is the asparagus plant isn't ready to eat until
it's three years old. Last year I planted a 2 year squid looking bulb like
root. They make like a tall spindly bamboo like bush the first two years. This February I got my surprise! 2 thick shoots sticking out of the ground!
If you want to plant a veggie that will
produce for 16 years. You can get an asparagus root at most garden
stores. The variety jersey knight is recommended for Georgia. The root is places tentacles down. Then 1 year later, you will have your First Asparagus.
For my darling Brittany, i made a Cape. It is reversible with green velvet on one side and a patterned faux suede velvet on the other, with the intent that it could be bother regal or taken for a hike. This is about a 1.5 hour project, so if you can get some velvet or other fabrics on sale, its a great present, one of a kind!
So, for my mom I waned to do something
special and practical. My parent have a cabin in the mountains so I
thought maybe something for that, then I thought of a quilt. It is a
very non-traditional quilt. I used microfiber just because it was SO
soft and ended up being cheaper than buying fabric from a fabric
store! I just bought a king sized blanket from wal-mart and cut it
up, attached it to the quilt portion and WALLAH!
My mom loved it! So much in fact she
for a while refused to take it to the mountain cabin.
FYI: Microfiber is not kind to
mistakes, you cannot rip seams out of it without tearing a whole in
the fabric! About $25 and 5 hours of work.
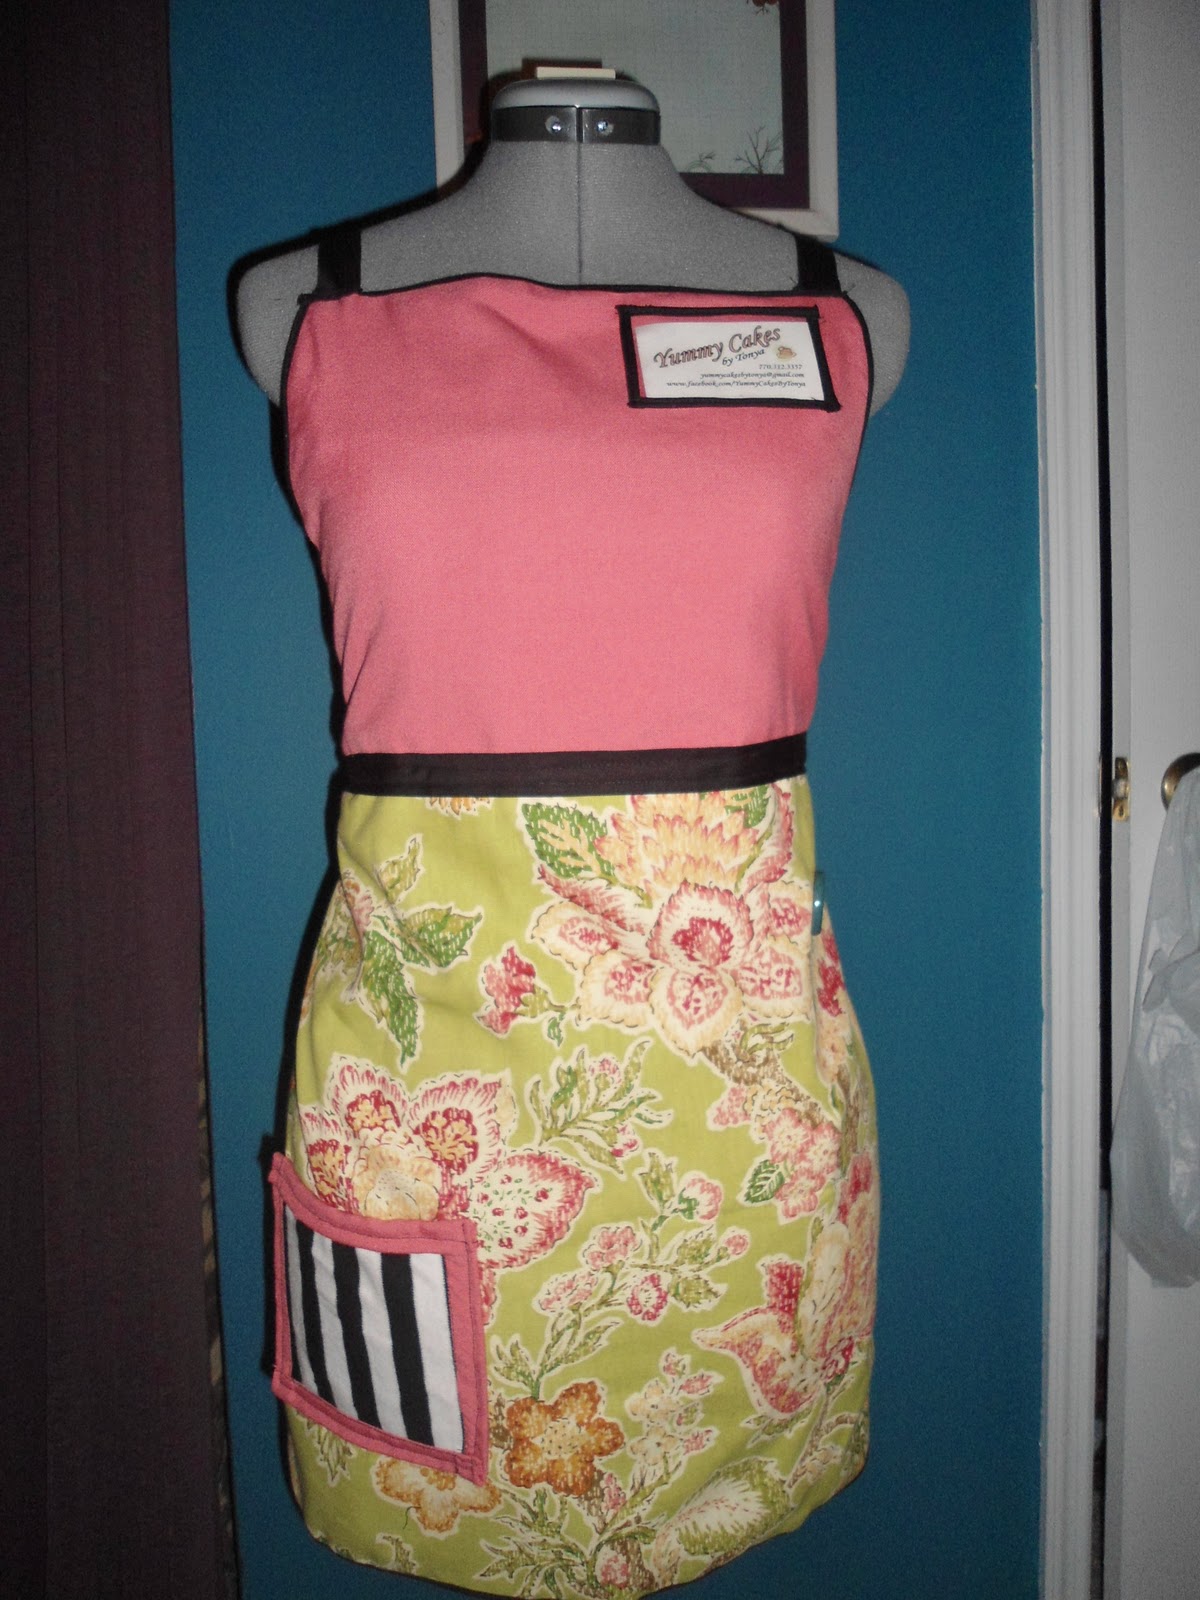
My sister is the picture of domesticity. She loves baking and now that she stays home, she started a cake business. She's awesome, she make cake pops, banana bread, coconut cake and a lot more! They are all wonderful!
So anyways, i wanted to make her an Apron she could wear to events she caters for her business. So i made her a reversible Apron with a plastic sleeve she can put her business cards in. This way it makes a her logo on her apron, but also a pocket so she can give out more business cards. For some Yummy Cakes by Tonya, see http://www.facebook.com/YummyCakesByTonya
So brothers are difficult when it comes to crafting presents. My
brother plays Frisbee golf and usually takes a lunch box to carry his
extra freebees. So I had an old messenger bag from middle school that
had a few holes and an ink stain. So i cut it to pieces and made a Frisbee Golf Bag,
I got the design from a company funnily enough called the nut sac- i
added a pocket for a water bottle. I liked the way it turned out. www.nutsacbags.com
Cooking your presents is just a good idea. Its cheap and thoughtful, so for my large extended family I decided to do Banana Bread for my dad's family and Hot Pepper Jelly for my mom's family.
Basic Recipe- we always have brown bananas in our freezer. Just defrost them...
3 or 4 ripe bananas, smashed
1/3 cup melted butter
1 cup sugar (can easily reduce to 3/4 cup)
1 egg, beaten
1 teaspoon vanilla
1 teaspoon baking soda
Pinch of salt
1 1/2 cups of all-purpose flour
350 degrees for an hour.
I got the Christmas towels at the dollar store Cost: $1.00 Time: 1.5 hours for 4 loaves
Hot Pepper Jelly is a southern thing,
this was a little ambitious but also fun. You have to have a hot
water bath caner and jars. It is cool to see your pepper flecks in
the amber liquid.
I used red Serrano and Green Jalapeno Peppers from
my garden.
For my little monster nephew, Ezekiel, I made a monster Jacket. It was generally the same idea and pattern as Soren's Jacket. Nice plaid fabric on one side and soft and silly on the other.


